Now, our GitHub repository and Azure Web App setup are ready. Let us implement the CI/CD pipeline with GitHub Actions.
GitHub Actions is a feature for automating various activities associated with a GitHub repository. GitHub Actions are triggered by events. GitHub has a wide range of events such as creating a pull request, opening an issue, forking a repository, pushing code to a repository, etc., that can trigger actions. We can define a set of activities that will be executed when any specific events are triggered.
Step #1: Configure GitHub Secret
To allow GitHub Actions to deploy our code to Azure Web App, we must authorize GitHub.
Go to the coffee-app repository page in GitHub. Click on Settings in the horizontal menu, and then click on Secrets in the vertical menu. You will get this page since we have not configured any secrets yet.
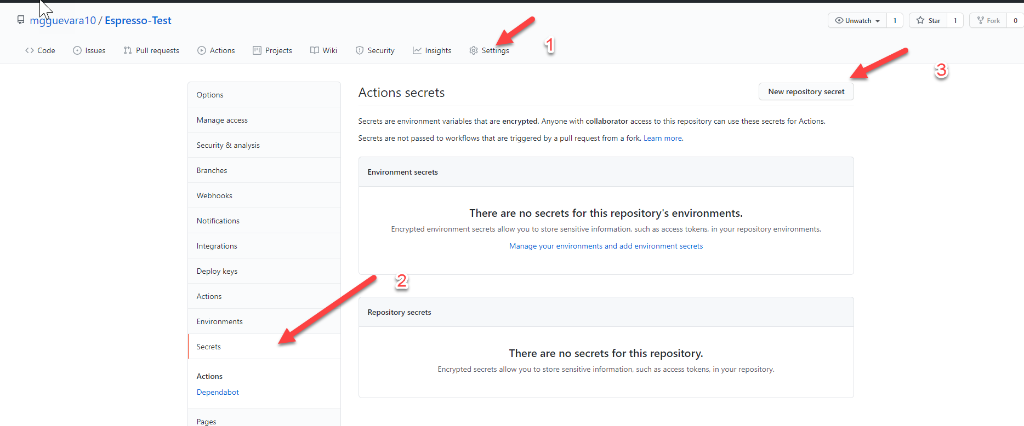
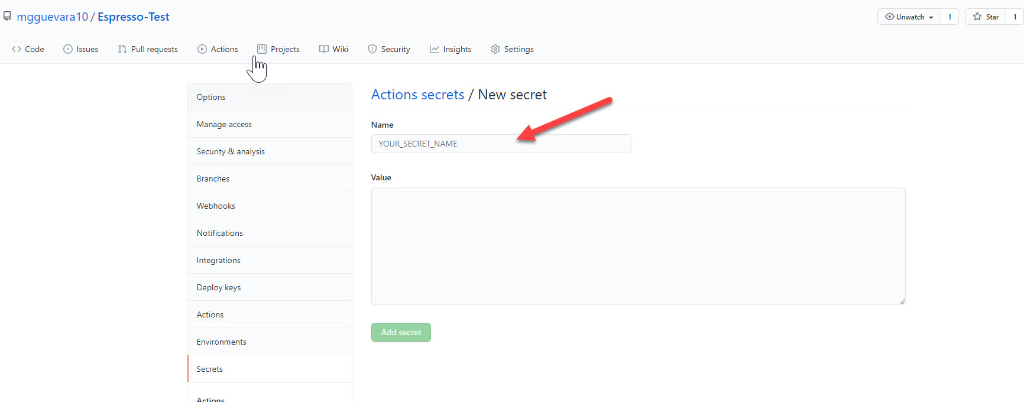
Click on New repository secret. Then, copy the contents of the your_application_name.PublishSettings file that we have downloaded in the previous section, and paste it to the value field.
Give the name AZURE_WEBAPP_PUBLISH_PROFILE and click on Add secret.
Step #2: Initialize GitHub Actions
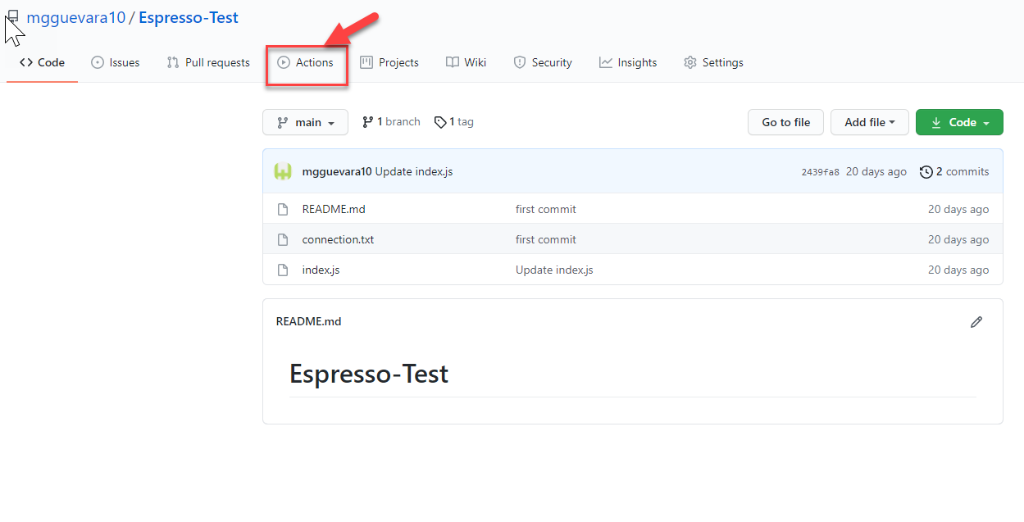
Go to the coffee-app repository page in GitHub. Click on Actions in the horizontal menu.
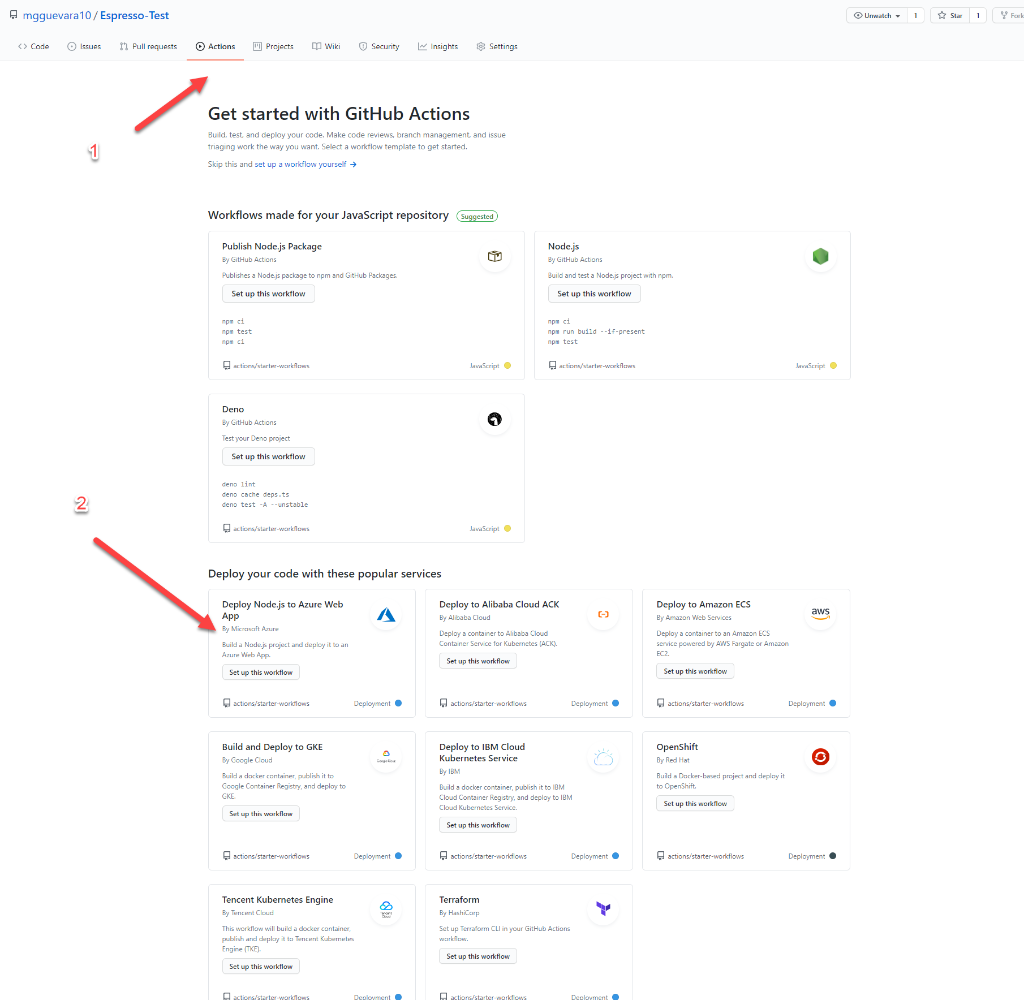
GitHub provides a set of pre-compiled actions for common use cases. In the 'Deploy Node.js to Azure Web App' box, click Set up this workflow.
Step #3: Update azure.yml
We get to edit a file named azure.yml file, which defines the GitHub Actions. This file has a set of default parameters set by GitHub. We have to update them according to our application setup.
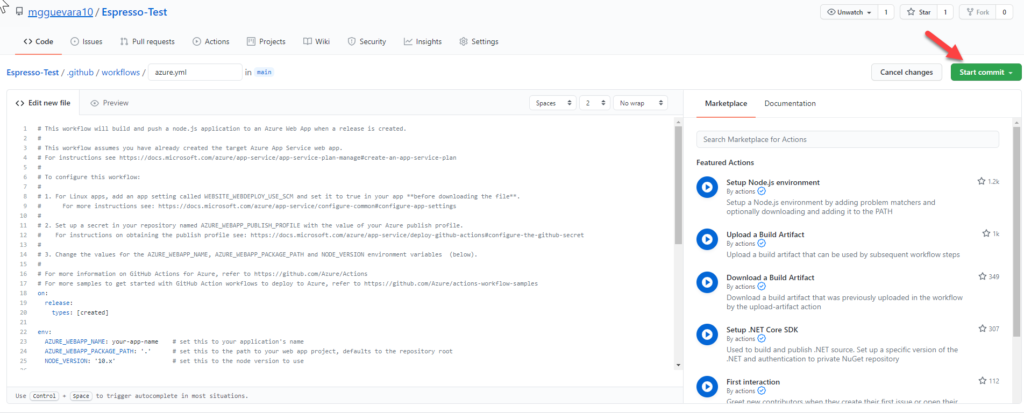
In this file, update the AZURE_WEBAPP_NAME to the name web app in Azure.
The parameter AZURE_WEBAPP_PACKAGE_PATH must be set to the path of the web app. Since our Node.js app is at the root of our repository we can keep . as default.
The NODE_VERSION must be set to the appropriate Node.js version. We shall set it to 14.x.
Our Node.js application has no external dependencies. So, we have not created the packages.json file in our repository. But, this azure.yml file has a step named npm install, build, and test. It has a series of commands that uses npm. Remove this part entirely since we are not going to use it.
- name: npm install, build, and test
  run: |
    # Build and test the project, then
    # deploy to Azure Web App.
    npm install
    npm run build --if-present
    npm run test --if-present
This is our final azure.yml file:
on:
  release:
    types: [created]

env:
  AZURE_WEBAPP_NAME: PuraVida-coffeeapp
  AZURE_WEBAPP_PACKAGE_PATH: '.'
  NODE_VERSION: '14.x'

jobs:
  build-and-deploy:
    runs-on: ubuntu-latest
    environment: production
    steps:
      - uses: actions/checkout@v2
      - name: Use Node.js ${{ env.NODE_VERSION }}
        uses: actions/setup-node@v2
        with:
          node-version: ${{ env.NODE_VERSION }}
      - name: 'Deploy to Azure WebApp'
        uses: azure/webapps-deploy@v2
        with:
          app-name: ${{ env.AZURE_WEBAPP_NAME }}
          publish-profile: ${{ secrets.AZURE_WEBAPP_PUBLISH_PROFILE }}
          package: ${{ env.AZURE_WEBAPP_PACKAGE_PATH }}
You may note that it's referring to AZURE_WEBAPP_PUBLISH_PROFILE parameter that we just created.
After updating all these changes in azure.yml, click on Start commit on the upper right side, and commit the azure.yml file.
Step #4: Create a Release
GitHub Actions are executed at certain events. You may have noted this part in the azure.yml:
on:
  release:
    types: [created]
It means that the defined actions are executed when a release event is triggered. So, let's create a new Release in GitHub.
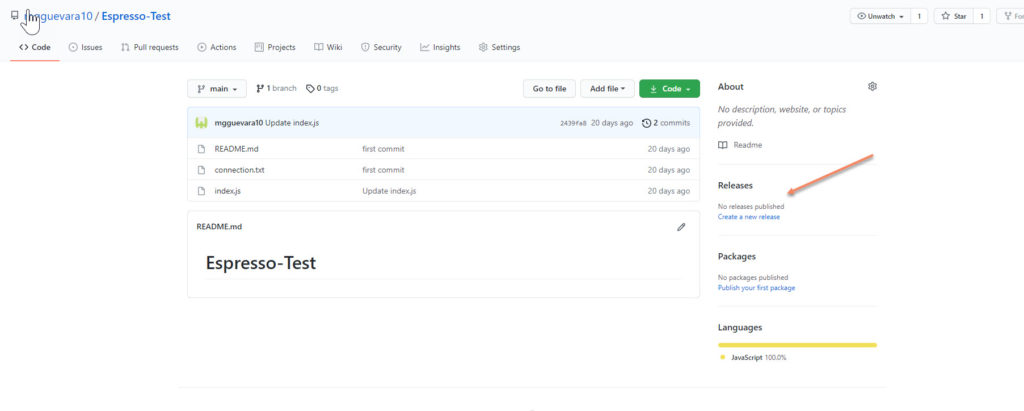
Go to the GitHub repository page. In the middle left, there is a section named Releases. We do not have created any release so, click on Create a new release.
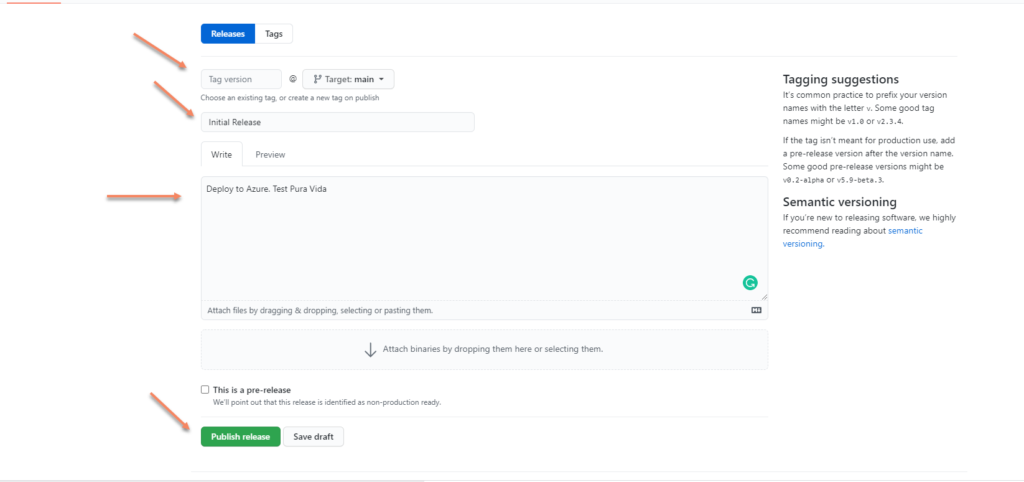
Fill in the Tag version, Release title, and Description fields appropriately.
Then, click on Publish release.
Step #5: Check the Workflow
The release event we created in the previous section should trigger the GitHub Actions workflow.
Click the Actions menu in the repository. You will see the green tick mark if the workflow run is successfully completed. If there are any failures, this will be red, and you will have to do some troubleshooting.
Step #6: Check the Web App
Go to the web application in the Azure portal and click on Browse in the top menu.
You will get the home page of your application.
Step #7: Create a New Release
Now, update the application, commit and push the code to GitHub, and create a new release. You will find that the Web App in Azure is automatically updated to the latest version at each consecutive release you create on GitHub.
Conclusion
I provided a low-level technical approach on how to implement a CI/CD pipeline with GitHub Actions to deploy a web app to Azure. If you're following along, make sure to read part 1.