Wouldn't it be amazing to leverage the workflow you use with Docker on all platforms? That's what this article is all about. In Getting Started with Docker in Azure, I will explore the possibilities offered by integrating these two instances.
Prerequisites
To follow this tutorial, you will need:
- Docker installed on your local development machine. If you are using Linux, you can install Docker by following the steps described in the official documentation. Alternatively, you can install Docker Desktop for Mac or Docker Desktop for Windows.
- Azure cloud account to run the containers. A free tier account is sufficient to get started.
- Text editor with syntax highlighting support. A good cross-platform option is VSCode or Atom.
Getting to know the basics: Docker vs. Azure
Before we dive into the creation and management of Docker containers in Azure, it's a good idea to be clear about the terminology used by each platform.
Azure Container Instances (ACI) - This is the service used to deploy containers in the Microsoft Azure public cloud. In this guide, we will use an integration with ACI developed by Docker that will allow us to work in the Azure cloud as if we were doing it locally.
Docker ACI context - All the containers we will use in Azure need a defined environment to run in. Docker has called these environments "contexts." You can think of contexts similarly to "namespaces" in Kubernetes.
Azure Resource Group - In Azure, a resource group consists of the resources to be used by the containers. This includes storage accounts, virtual networks, virtual machines, and more.
Working with Docker vs. working with Azure
There is no better way to get started with Docker in Azure than with an example that shows its basic differences. In the next two sections, we will run a container, first using Azure and then Docker.
Azure native Cloud Shell
Let's start by creating a simple container using the Azure Cloud Shell. To do this, open the Azure CLI, either locally or from the Azure portal.
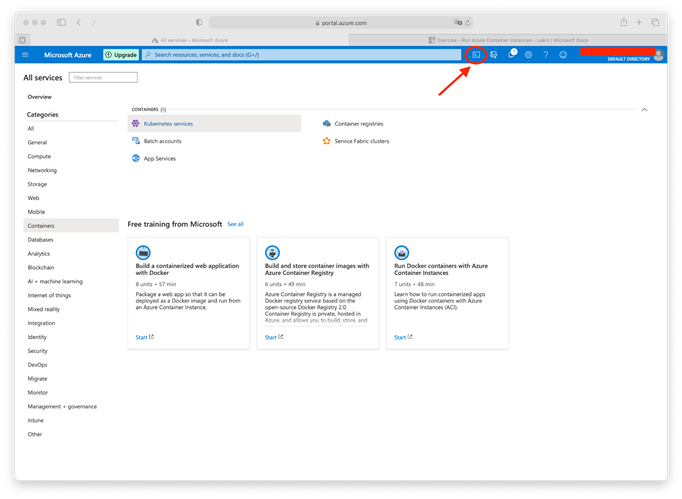
The next step is to create a resource group to run our container. For this example, we will use the name "azure-rg" and the location "eastus" (East US); however, feel free to change these values to fit your needs.
From the console, run the following command:
$ az group create --name azure-rg --location eastus
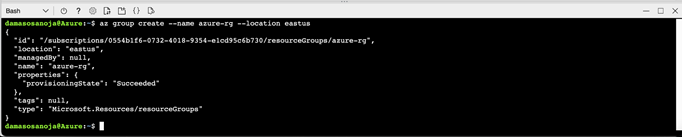
You will receive a message indicating that the resource group has been successfully created.
Now, run the command below to create the container azurehelloworld in the resource group azure-rg:
$ az container create \
  --resource-group azure-rg \
  --name azurehelloworld \
  --image microsoft/aci-helloworld \
  --ports 80 \
  --dns-name-label unique-container-dns-label \
  --location eastus
Once the process is ready, your container should be up and running. You can check the container status and FQDN by running:
$ az container show \
  --resource-group azure-rg \
  --name azurehelloworld \
  --query "{FQDN:ipAddress.fqdn,ProvisioningState:provisioningState}" \
  --out table
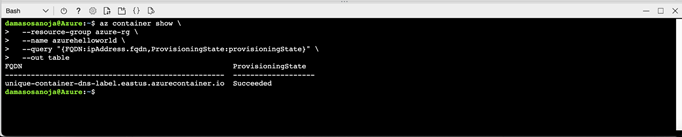
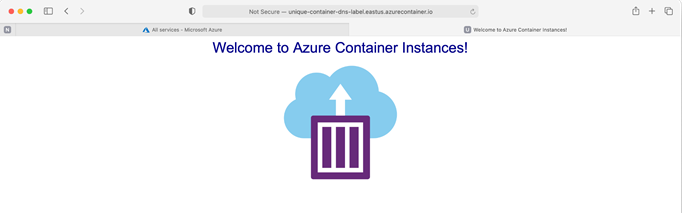
The terminal should show something similar to this output. Now, copy the FQDN from the terminal window and paste it in the address bar of your browser. You should see the container running successfully.
Docker ACI integration
Having demonstrated the procedure in the native Azure environment, it's time to make way for Docker.
Before working in the Azure cloud, the first step is to log in to both Docker Hub and Azure cloud. Start by opening the terminal and typing in the console:
$ docker login
After entering your credentials, perform a similar procedure for Azure. Still in the terminal, use the following command:
$ docker login azure
Depending on the operating system of your local machine, this command may open a browser window to log in to your Azure account or ask you to enter an authentication token. Once you are logged in, you will be ready to continue.
The first step to start working with Docker in Azure is to create a context where containers can run. To create your first ACI context, use the command below:
$ docker context create aci mycontext
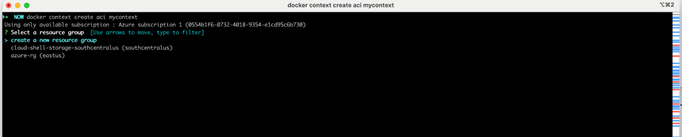
Once the command is entered, you will be asked if you want to use an existing resource group or create a new one. For our example, we will choose to create a new one.
Now, check docker context creation by issuing:
$ docker context list
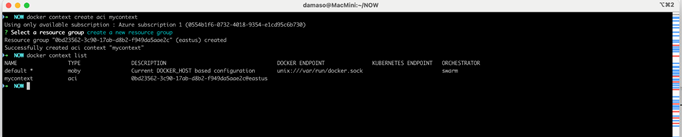
If you are following this guide, you should have two contexts: "default" (local context) and "mycontext" (remote context in ACI).
Once the context is created, all you have to do to run a container in Azure is using a command similar to the one you are used to:
$ docker --context mycontext run -d --name dockerhelloworld -p 80:80 mcr.microsoft.com/azuredocs/aci-helloworld
Note the addition of --context mycontext. This tells Docker which context to use. From now on, you must specify the context in use with each command.
Back to the terminal, verify the container status using the command:
$ docker --context mycontext ps
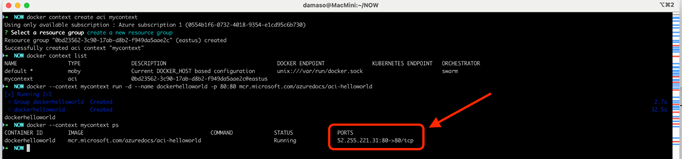
The first thing you will notice is that only the container you just created using Docker is listed. This happens because Docker can only list containers created in the specified context.
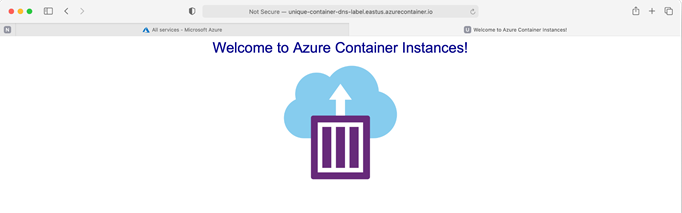
Now, copy the container IP address and paste it into your browser. You should get the same result as the Azure-deployed container.
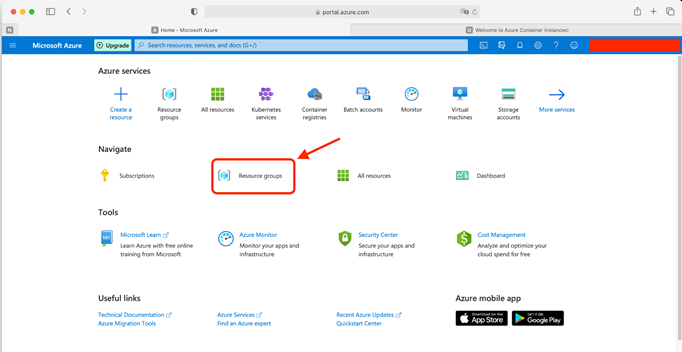
Let's take a look at what we have so far in the Azure portal. First, click on "Resource groups."
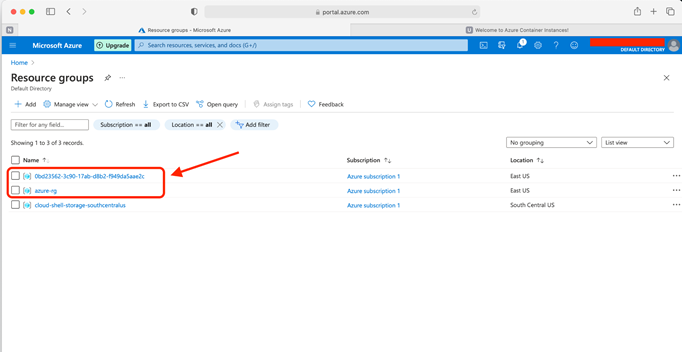
You should be able to see the resource groups created so far, both the first one created from the portal and the second one created using Docker.
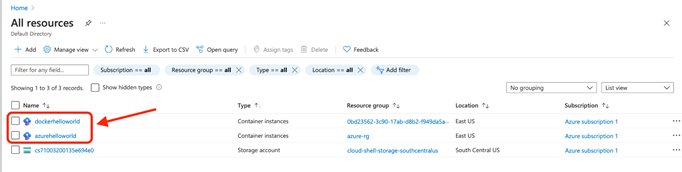
Similarly, you can confirm that both containers are running by going to the "All resources" section.
Final thoughts
In this blog, I have briefly explored the possibilities offered by the integration of Docker with ACI. You may have already noticed some key points during this tutorial:
- Integrating Docker with ACI opens up the possibility to work locally and use the commands you are already used to.
- The workflow with Docker is somewhat faster for basic operations. However, as you perform more complex operations, this could change quickly.
- The integration with ACI has its limitations. It will be unavoidable to use the Azure Shell for certain operations. This may change over time, but for now, you will only be able to perform basic operations from within Docker.
For more information about ACI integration, we invite you to read the official Docker documentation.